BLOG 1

LOCUST POSE FOR SEPTEMBER

LOCUST POSE | SALABHASANA

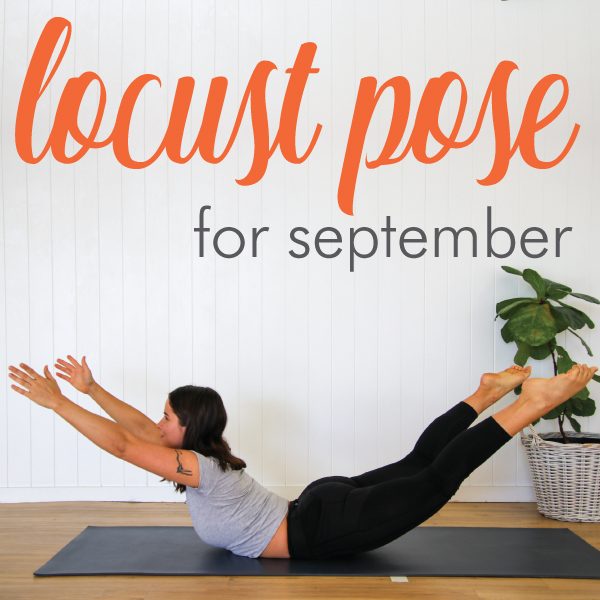
Our pose of the month for September is Locust Pose. In yoga this is known as Salabasana and in Pilates & Barre back extension exercises. This pose is amazing to help maintain a healthy spine by increasing the flexibility of your thoracic spine and strengthening the glutes. Most importantly an engagement of the abs is needed so you can support and stabilise your lower back so it doesn't do all the work.

There's plenty of variations of this pose. You could try:
↠ stacking your palms with your elbows out wide and gently lifting your head and upper back
↠ reaching the fingertips back and the arms along the body
↠ bringing the arms out wide with thumbs up to the ceiling
↠ reaching the arms forwards
↠ interlacing the fingers behind the back
↠ lifting the opposite arm to leg
↠ swimming with arms and legs
↠ the full version placing your arms underneath you and lifting your legs to the sky
SKULL SHINING BREATH FOR AUGUST

SKULL SHINING BREATH | KAPALABHATI

August at Zama is all about shining so it only makes sense that our Pose of the Month is Skull Shining Breath (also known as Kapalabhati or Breath of Fire). It's an energising breath that releases stress, toxins, negative emotions & helps clear stuck energy in the body. It also cleanses the sinuses, subtlety tones abdominals, boosts digestion and assists the respiratory system. If you need a natural caffeine hit you can use this breath to help wake up & stimulate your senses, and if you need to clear anything out physically or energetically you can use this to get all bright & shiny again!

Get into a comfortable seated position and rest your hand to your lower belly underneath the navel. As you inhale you should feel the breath expand out towards your hand and as you exhale feel the breath pull back towards your spine. You only have to focus on the exhale as the inhale is passive and looks after itself. Make the exhale strong and sharp almost like you're trying to blow out a candle with your nose. The breath is working on pumping out your diaphragm and being able to use your exhales to clear out your system. It doesn’t need to be super fast but should be a consistent rhythm. Remember to try and relax your jaw and your forehead. Try for two rounds of 30 strokes (breaths) and one round of 50 strokes.

“To shine your brightest light is to be who you truly are.”

GOMUKHASANA FOR JULY

COW FACE POSE | GOMUKHASANA

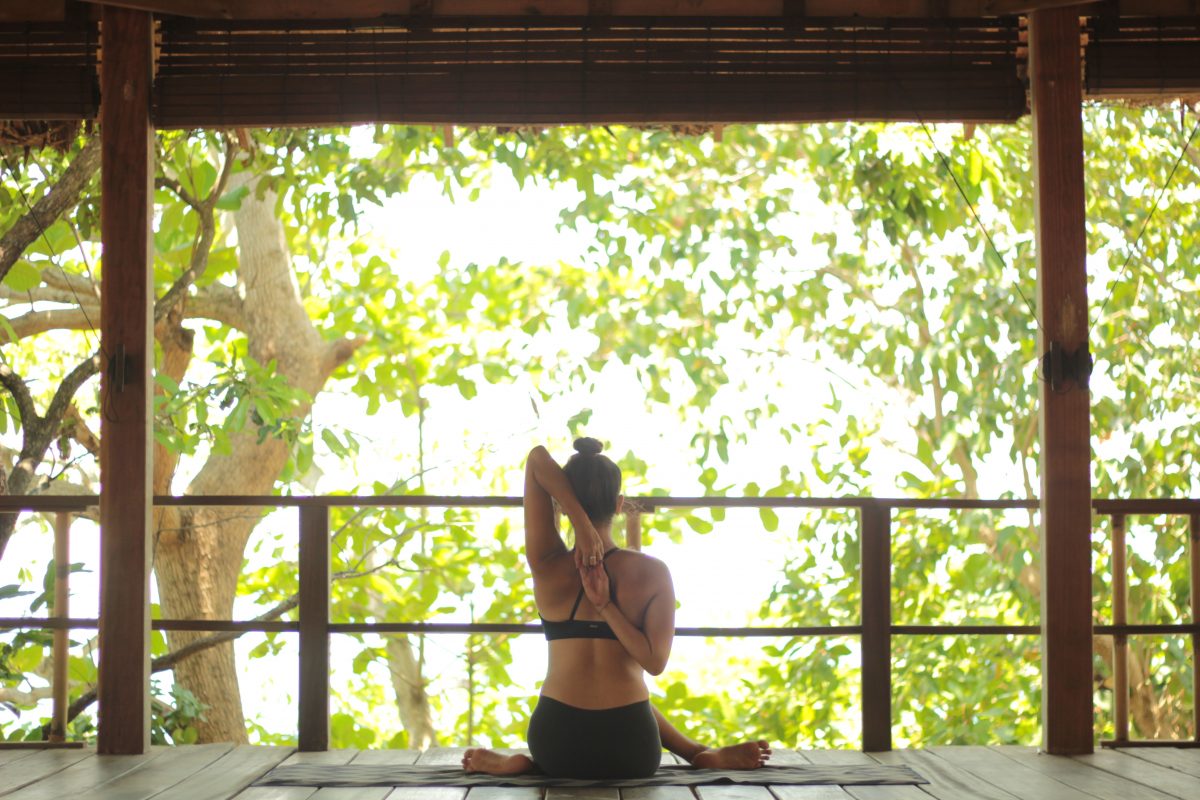
Our Zama pose for the month is Gomukhasana, also known as Cow Face Pose. How is it a cow face? Your crossed legs are the cow's mouth, your torso the snout and your arms are the ears (you may have to close one eye to really imagine it!). Even if you can't visualise the cow face this posture, it is amazing for stretching the outer hips, thighs and ankles, opening up your chest and thoracic spine, and working your arms, shoulders and upper back.

There are plenty of variations you can try:
↠ Take a half version with the bottom leg extended and the other stacked on top.
↠ Open up the back of shoulders by taking eagle arms.
↠ Enjoy a twist in the pose
↠ Take a lengthening side bend
↠ Fold forward and surrender
↠ You can even lay on your back and take the pose reclining!

DOLPHIN PLANK FOR JUNE

DOLPHIN PLANK | MAKARA ADHO MUKHA SVANASANA

Warm up this winter with Dolphin Plank our Pose of the Month. It's a sweet combo of Dolphin Pose & Plank Pose which strengthens and tones the core, thighs & arms. Teachers love to do that super slow count down for this one. You know the one where they repeat a number a couple of times and you're there shaking and thinking get on with it!

To get into Dolphin Plank you can start on your hands and knees then bring your forearms down to the floor, tuck your toes and extend one leg back at a time. Make sure your fingers are facing forward and your shoulders are directly over your elbows. Press your forearms down, broaden your collarbones and draw your shoulder blades down the back. You want to feel like the front of your thighs are reaching the ceiling and lengthening your sitting bones towards your feet and your inner heels to the back of the room. You shouldn't be like the Sydney Harbour Bridge so check your torso is parallel to the floor. Make sure to not drop your head either otherwise gravity will take over, so find that length out through your crown and most importantly keep those face muscles soft. It's a strong pose so remember to lower your knees if you need to modify but keep that feeling of cinching around the waist and pressing the floor away.

You can do lots of fun things in Dolphin Plank besides holding it still. Play with dipping your hips side to side, walking the feet in for Dolphin Pose, drawing your knees one at a time in towards your chest, lift a leg, go into side forearm plank - whatever you do, do it with a purpoise (that's a dolphin joke).

GARUDA MUDRA FOR MAY

GARUDA MUDRA | EAGLE SEAL

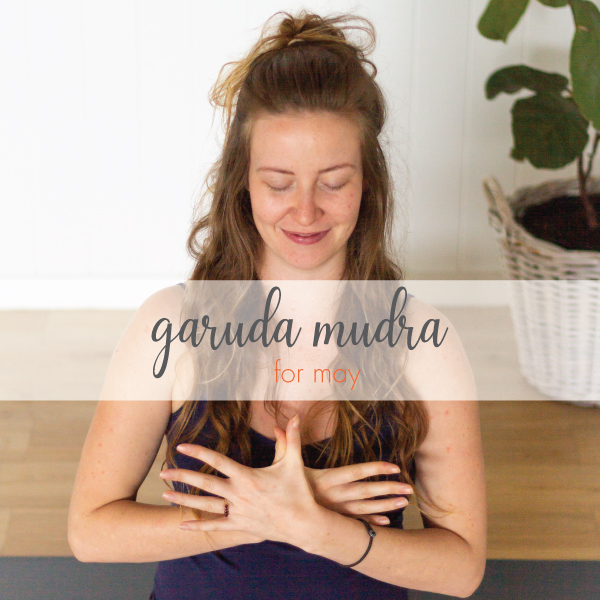
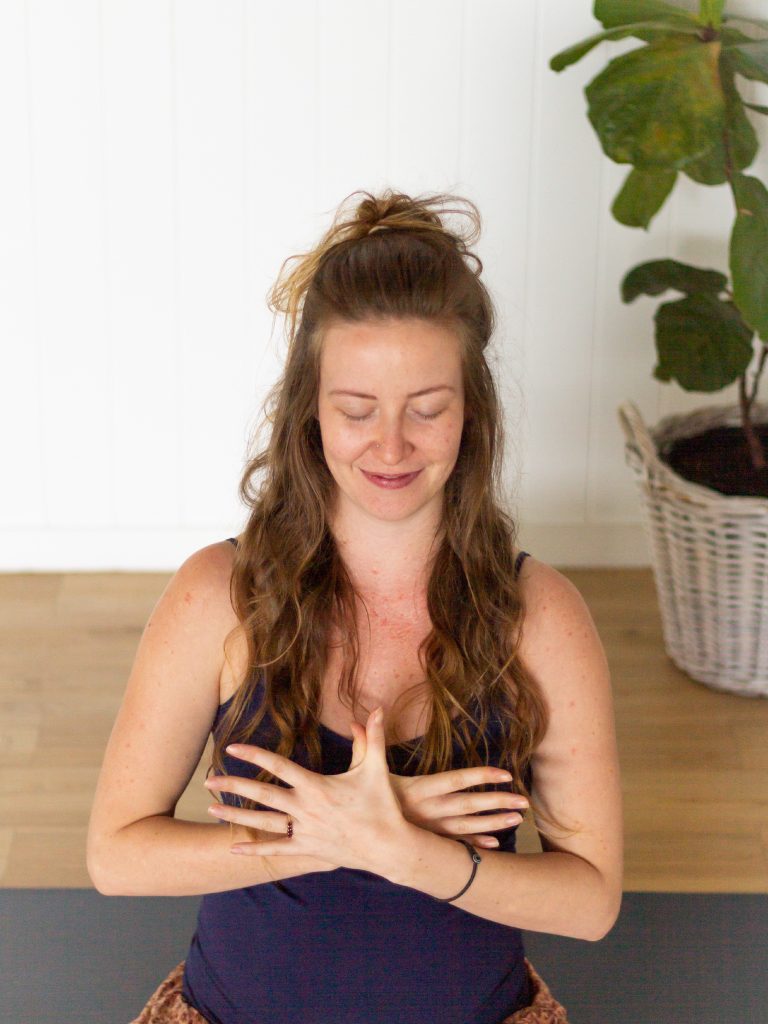
May is for Mudras and this month Gardua Mudra (Eagle Seal) is our Pose of the Month.

Garuda Mudra is an energising & invigorating seal that is helpful to balance vata (air) energy in the body. When vata is out of balance in the body there is a feeling of restlessness and anxiousness so performing Garuda Mudra cultivates perseverance, commitment and discipline.

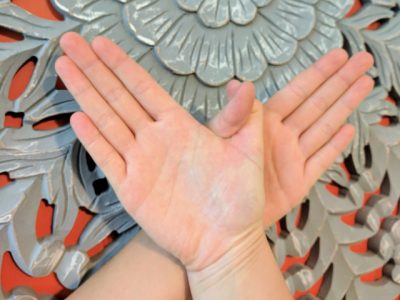
To perform Garuda Mudra, place the right hand on top of the left hand, hooking the thumbs. The position of the hands should look like wings representing the eagle Gardua. In a seated position the palms of the hands can be facing towards you and be moved around the body in front of the chest, the navel and the lower belly. It's nice to hold the mudra for around 10 breaths in each position. Vata energy is also quite creative so you can explore incorporating Garuda Mudra in poses like Warrior II by opening your arms out like wings and bringing the seal back in towards your heart. The sky's the limit!

"may you soar on eagle wings,
high above the world"

RABBIT POSE FOR APRIL

RABBIT POSE | SASANGASANA

As we hop into Easter it only seems fitting to have Rabbit Pose (Sasangasana) as our Pose of the Month!

It's a beautiful round and soft shape that stretches the neck and upper spine, and has a relaxing effect on the nervous system. It's also like a mini inversion as you are on the very top of your head so is a great alternative to shoulderstand or headstand.

You can come into the pose from a high kneeling position with the knees hip width apart and bowing the head forward so that the very top of your crown comes down to the floor just in front of your knees and then reaching your hands towards your heels. For some it may feel better starting from Child's Pose holding the heels first and then lifting the hips up and then placing the head on the floor. It's up to you if you want to tuck the toes under or just have the front of the feet on top of the floor. If holding your heels isn't available you can hold onto your calves or ankles with your hands instead.

See if you can try and bring your thighs so they are nearly vertical and remember to not place too much weight on your head to keep your neck safe. Expand the back of the shoulders and feel the gorgeous stretch along the upper back. Breathe a little deeper into that space for up to five breaths. You may even want to come into Throat Lock (Jalandhara Bandha).

If you're feeling discomfort you can always place a blanket underneath the knees or the head.

To get out of the pose gently release your hips towards your heels and let go with your hands and either slowly come up into Thunderbolt Pose or rest down into Child's Pose.

Don’t ground the sit bones! Thoughts on Seated Postures

Don't ground the sit bones! Thoughts on Seated Postures

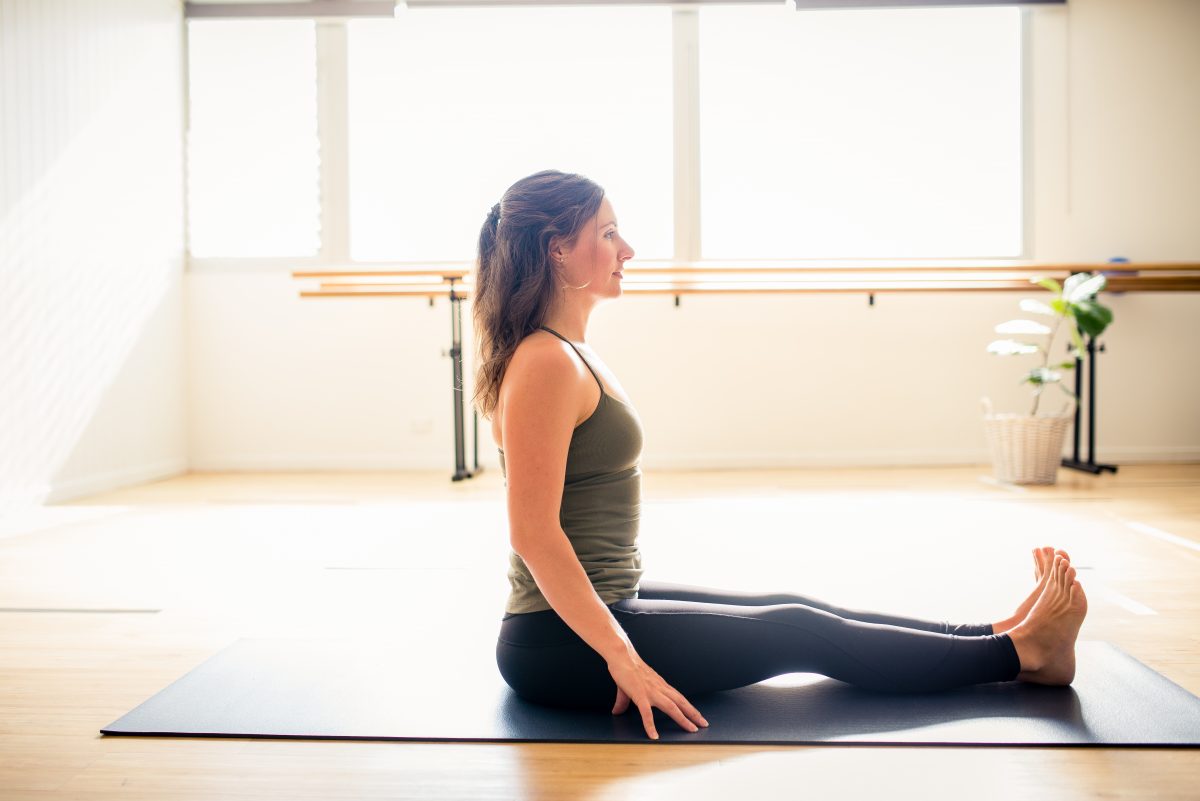
The majority of the population have difficulty sitting in general, let alone for an extended period of time for yoga and meditation.

The most important anatomical consideration (excluding any injuries, which must be treated case by case) is the position of the pelvis. The pelvis can be thought of as a pot from which the spine grows. The pelvic must be neutral in order to effectively support the spine.

Many (in fact most) beginner yoga students tuck their tailbones when they sit. This brings pelvis into a posterior tilt, affecting the ability of the spine to stay neutral. Flexion (rounding) of the spine can cause extra pressure on sitting, making it more physically difficult to sit. Students will then usually try to correct this rounding by lifting from the chest, which contracts and tightens the erector spinae muscles (fast twitch muscles not designed to be held for long periods) and creates even more strain.

When you tuck the tailbone and round the lower back, the diaphragm is inhibited (it is attached at L1/T12) and breathing is affected. The facet joints at the back are also open which puts pressure on the spinal discs anteriorly (at the front). The lower back is actually compromised, not supported. A neutral position of the lumbar spine is a curve.

Starting from the pelvic basin is key to aligning the rest of the spine, having the effect of reduced muscular effort. An aligned spine is also the best position for raising prana and kundalini energies during meditation.

Aligning the Pelvis

To align the pelvis, imagine the front of the pelvis as a triangle and draw weight downwards from the centre of the pubic bone. The psoas will draw the lumbar spine in to an arch and this will help to support sitting and breathing. The psoas is a slow twitch muscle that can be active for a longer period before exhausting.

Despite the common instruction heard in yoga to "ground the sit bones", we actually want equal weight at the front and back of the pelvis when sitting. The cue "ground the sit bones" in most students will result in a tucking of the tailbone - a no no when sitting for yoga and meditation.

Instead we aim to bring the centre of the pelvis (generally around the perineum area) into parallel alignment with the floor. The spine can then float more effortlessly over the pelvis.

A Note on Forward Bends

The cue "ground the sit bones" is often instructed in a seated position prior to a forward folding posture in yoga asana practice. While spinal flexion is a key component of the posture once the student is in the posture, an anterior tilt of the pelvis is the initial action required of the body to enter the forward bend - that is that the pelvis must tip forward, not back. Tucking the tailbone/grounding the sit bones in the seated posture can inhibit pelvic movement required to bend forward and result in a strained posture.

Aligning from the Pelvis

Once the pelvis is in alignment, aligning the rest of the body is usually simple.

Soften the knees and relax the legs.

Float the ribs over the hips.

Float the skull over the spine. Soften the jaw and let the chin slightly drop.

Relax the shoulders and let the arms soften and release. Don't push the shoulders back and down.

Relax the hands on the legs below the navel and lower than the elbow joint, or use a mudra.

Softly close the eyes or use a mudra.

Using Props for Sitting

Quite often students will need support to achieve a neutral pelvis without creating effort in the rest of the body. Anatomical limitations (skeletal differences), inflexibility and injury can result in a decreased in range of movement and sitting without support can be difficult.

For those who when seated cannot comfortably bring their knees lower than their hips (i.e. without effort), or have hip or knee injuries, it is best to use props.

Begin by propping the pelvis and sitting the student on the edge of a stack of folded blankets. Use as many blankets as required until the knees are lower than the hips. Ensure the students places the sit bones at the edge of the blankets otherwise this technique will not be effective.

Using this technique, the pelvis can come into neutral alignment.

Once the pelvis is neutral, you can support the hips and knees from underneath. Place rolled up blankets underneath the space between the outer thigh and the floor so the student can soften their legs into the blankets.

Students may also like padding underneath their ankles - make sure it doesn't lift the ankles too much and is just there to soften between the mat/floor and ankles.

Seated Meditation Positions

When it comes to sitting for meditation, there are many postures and positions that can be used, including sukhasana, padmasana (lotus) and baddha konasana. Sukhasana is the most easily accessible posture for most students.

Sukhasana (easy cross legged position)

  • Sit comfortably and cross the legs. Ensure the pelvis is neutral and the upper body is upright.
  • Place a support under the pelvis if required.
  • Allow the knees to comfortably fall out to the sides, with blocks or blankets underneath for support if required

You can vary this pose by uncrossing the legs and ankles and placing one leg in front of the other, or coming into half lotus where one leg is placed on top of the other. These postures should only be practiced by students who are well practiced at them.

For students who cannot sit on the floor, use a chair, with their sit bones towards the edge of the chair to maintain pelvic alignment. A cushion or blanket on the chair may be required.

Kneeling Positions for Meditation

For students who cannot cross their legs, or sit cross legged for a length of time, even with support, supported kneeling positions are a good option.

A bolster lengthwise or a zafu on its side placed between the legs in kneeling will give support to the pelvis and aid in achieving neutral pelvic alignment.

A student may also need a blanket on the mat or floor to cushion the ankles.

For students who cannot sit or kneel at all due to knee or hip problems, use savasana!

Enrol in yoga or meditation teacher training today.

AHIMSA FOR MARCH

AHIMSA: LOVE & COMPASSION FOR ALL

Did you know that Asana (Yoga postures) are only one part of the eight limbs of Yoga? Yamas are the first limb and are the moral, ethical and societal guidelines that make our relationships easier, happier and healthier. The first of the five Yamas is Ahimsa meaning non-violence or non-harming, so to practice non-violence we embrace love, kindness & compassion.

Physical non-violence is pretty obvious: it's extrememly frowned up to go around knocking people out. Many Yogis also extend this love & compassion to all beings including animals and the planet. You could try things like adding more vegetarian meals to your diet and limit single use plastics by using reusable bags & cups.

In your Asana practice when you come to a difficult pose don't take it personally but use it as a teaching moment to yourself. It's not about performing in the posture but instead being kind to yourself and recognise your limitations with an open heart. Maybe in the pose you could just sit and observe, maybe you can find a variation which works for your body, or maybe you can try but smile if you fall!

Now, we can also be violent in our thoughts and our words. Listen to the inner dialogue that is going on. Is it kind? If not, why are we saying it? When we start to recognise what we're saying and understand where it's coming from that's when change begins to happen. Down below are two exercises which cultivate this dialogue of love, kindness and compassion.

LOVE LETTER

You know when a friend is down or upset and we say all of these kind & loving things to remind them how wonderful they are? Things like 'YOU ARE AMAZING' and 'BABE, DON'T WORRY - YOU'VE TOTALLY GOT THIS'. How often do we say these kind & loving to ourselves? YOU, out of anybody in the entire universe deserve YOUR love & affection. So get comfy, make a hot cup of tea and spend 5 minutes writing a love letter to yourself.

In your letter you could write:
- things that you are proud of that you've accomplished
- words of encouragement for those times you are doubting yourself
- things you love about yourself physically (hi cute freckles!)
- things that you love about your personality or nature
- things that you are grateful for which have brought you to where you are now

Whenever you're feeling less than magic pull out this letter and remind yourself how amazing and loved you truly are.

LOVING KINDNESS MEDITATION

To practice loving-kindness meditation, sit in a comfortable and relaxed manner. Take two or three deep breaths with slow, long and complete exhalations. Let go of any concerns or preoccupations. For a few minutes, feel or imagine the breath moving through the center of your chest - in the area of your heart.

Metta is first practiced toward oneself, since we often have difficulty loving others without first loving ourselves. Sitting quietly, mentally repeat, slowly and steadily, the following or similar phrases:

May I be happy. May I be well. May I be safe. May I be peaceful and at ease.

While you say these phrases, allow yourself to sink into the intentions they express. Loving-kindness meditation consists primarily of connecting to the intention of wishing ourselves or others happiness. However, if feelings of warmth, friendliness, or love arise in the body or mind, connect to them, allowing them to grow as you repeat the phrases. As an aid to the meditation, you might hold an image of yourself in your mind's eye. This helps reinforce the intentions expressed in the phrases.

After a period of directing loving-kindness toward yourself, bring to mind a friend or someone in your life who has deeply cared for you. Then slowly repeat phrases of loving-kindness toward them:

May you be happy. May you be well. May you be safe. May you be peaceful and at ease.

As you say these phrases, again sink into their intention or heartfelt meaning. And, if any feelings of loving-kindness arise, connect the feelings with the phrases so that the feelings may become stronger as you repeat the words.

As you continue the meditation, you can bring to mind other friends, neighbors, acquaintances, strangers, animals, and finally people with whom you have difficulty. You can either use the same phrases, repeating them again and again, or make up phrases that better represent the loving-kindness you feel toward these beings. In addition to simple and perhaps personal and creative forms of metta practice, there is a classic and systematic approach to metta as an intensive meditation practice. Because the classic meditation is fairly elaborate, it is usually undertaken during periods of intensive metta practice on retreat.

Sometimes during loving-kindness meditation, seemingly opposite feelings such as anger, grief, or sadness may arise. Take these to be signs that your heart is softening, revealing what is held there. You can either shift to mindfulness practice or you can—with whatever patience, acceptance, and kindness you can muster for such feelings—direct loving-kindness toward them. Above all, remember that there is no need to judge yourself for having these feelings.

Parasympathetic Dominance: The key to less stress

Just relax. Sounds simple, right?

But how often do you truly relax? Really, truly, RELAX?

Most people think they relax when they sit down and watch tv, go for a walk or read a book. But as far as the accepted clinical definition of relaxation goes, these activities are far from relaxing.

Each is a stimulant. They require the brain to respond to stimuli and keep the sympathetic nervous system running, both so that the brain can filter the stimuli, and so any dangers that might arise can be responded to accordingly.
The clinically accepted definition of relaxation is termed “The Relaxation Response”. It is generally characterised by a reduction in blood pressure, respiratory rate, body temperature and resting heart rate, and relaxed muscles. Overall oxygen consumption is reduced, while there is an increase of oxygen to the brain.

Parasympathetic dominance in the nervous system is effectively what occurs when relaxation is apparent in the body. This enables the body to counter cortisol levels and effectively release stress from the cells.

A recent study compared "The Relaxation Response" to another similar de-stressing program, the "Mindfulness-Based Stress Reduction". While both of these styles of de-stressing are based on meditation practices that we use in yoga, the findings highlighted the differing areas of the brain that are influenced when employing each method. It was found that "The Relaxation Response" strengthened neural pathways related to deliberate control, whereas the mindfulness program was linked more to sensory awareness mechanisms in the brain.

So how do we achieve this state?

There are many breathing and meditation techniques that have been studied and are shown to induce relaxation. Many have shared characteristics - such as, studies have show that it is known to be easier to relax when one is warm, comfortable, and feeling safe in a dark, quiet space with little to no stimulation of the senses. In a sense, simulating the state we were in when we began our life journey in our mother's womb. A generous amount of time to enter the desired state of relaxation is also required - trying to 'feel relaxed' cannot be rushed, as that negates the whole purpose of the exercise!

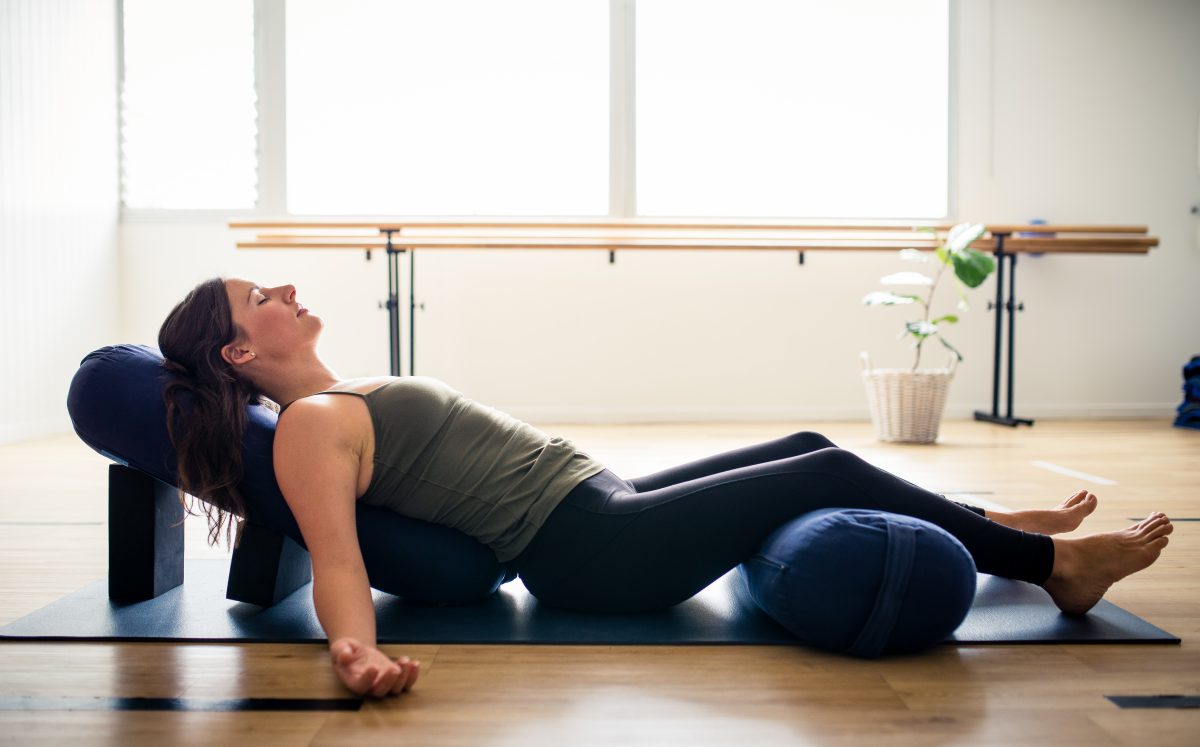
In restorative yoga asana, the body is completely supported and comfortable. The nervous system responds with less stress when the body is symmetrical, so it is critical that time is given to ensure the body is evenly supported. There should be minimal stretch sensation, or any effort felt at all, when the body is in a restorative yoga pose. This reduces neuromuscular activity, including pain messages, warning signals and proprioception, which aids the nervous system in entering parasympathetic dominance.

Restorative yoga gives the body time to enter the state of parasympathetic dominance. Many postures are held (with no effort) for around 20mins, giving the body and mind enough time and space to relax.

Blankets keep the body warm during restorative yoga, and eliminating the use of music and scents (like essential oils and incense) will ensure more students will relax. Eye pillows help block out light and the sense of sight, aiding the transition to pratyahara (withdrawal of the senses). The gentle pressure on the eyes from the eye pillows also stimulates the ocular vagal reflex, activating the vagus nerve and hence aiding parasympathetic dominance.

Dominance of the parasympathetic nervous system is where all the deliciousness of restorative yoga happens.

Studies show that restorative yoga can help weight loss, cardiovascular disease, stress levels, improve sleep, reduce symptoms of depression and anxiety, and more.

LEARN TO TEACH PARASYMPATHETIC DOMINANCE
RESTORATIVE YOGA TEACHER TRAINING | YOGA NIDRA TEACHER TRAINING | MEDITATION TEACHER TRAINING

References

  1. Caffrey, M. 2013. Health benefits of restorative yoga include trimming fat, NIH-funded study finds. AJMC. http://www.ajmc.com/press-release/health-benefits-of-restorative-yoga-include-trimming-fat-nih-funded-study-finds
  2. Forbes, B., Akturk, C., Cummer-Nacco, C., Gaither, P., Gotz, J., Harper, A., Hartsell, K. 2008. Yoga Therapy in Practice: Using Integrative Yoga Therapeutics in the Treatment of Comorbid Anxiety and Depression. International Journal of Yoga Therapy. http://www.iaytjournals.org/doi/pdf/10.17761/ijyt.18.1.p8171x45n6328107
  3. Mustian, K.M., Sprod, L.K., Janelsins, M., Peppone, L.J., Palesh, O.G., Chandwani, K., Reddy, P.S., Melnik, M.K., Heckler, C. & Morrow, G.R. 2013. Multicenter, Randomized Controlled Trial of Yoga for Sleep Quality Among Cancer Survivors. PMC. https://www.ncbi.nlm.nih.gov/pmc/articles/PMC3757292/
  4. Siber, K. 2014. Why you need a restorative yoga practice this winter. Yoga Journal. https://www.google.com.au/amp/s/www.yogajournal.com/.amp/lifestyle/need-restorative-yoga-practice-winter
  5. Massachusetts General Hospital. 2018. Mindfulness meditation and relaxation response have different effects on brain function. Medical Xpress. https://m.medicalxpress.com/news/2018-06-mindfulness-meditation-response-effects-brain.html

THREAD THE NEEDLE FOR FEBRUARY

PARSVA BALASANA

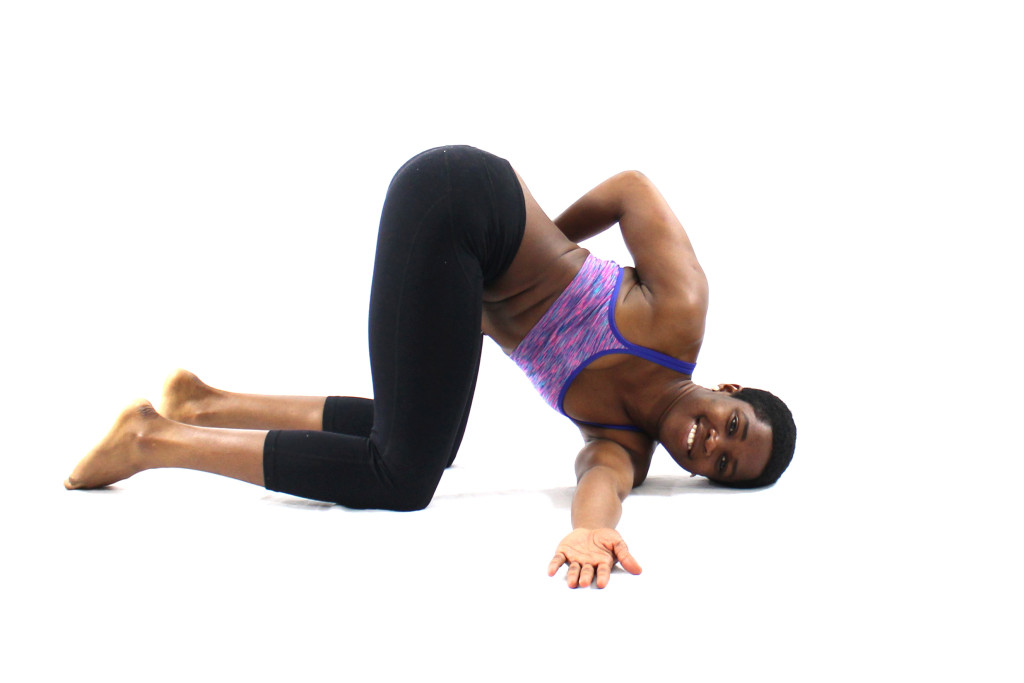
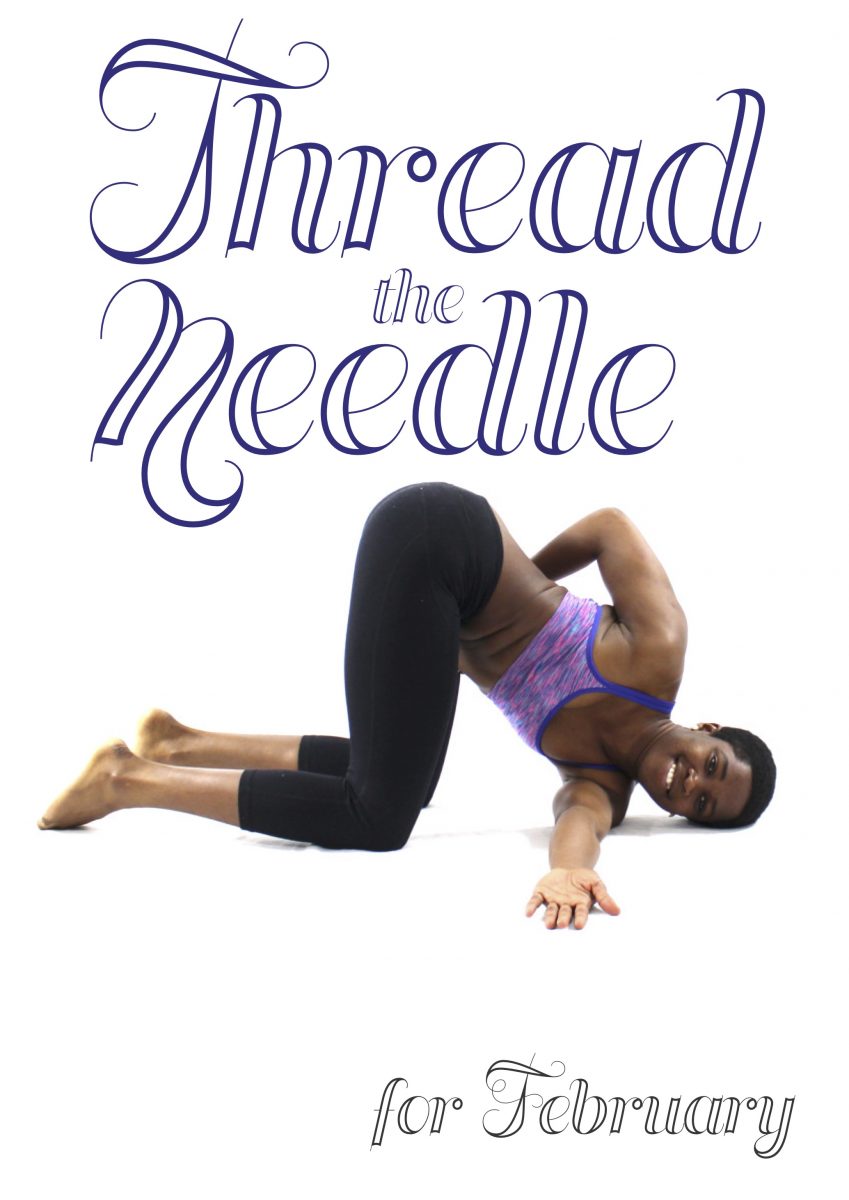
We've got a surrendering, shoulder-releasing, spine-twisting, sweet-spot, simple stretch for February - Thread the Needle! Those who know it already love it, and if you're new to Thread the Needle you're in for a real treat. Also known by its Sanskrit name Parsva Balasana, Thread the Needle opens up your upper body - shoulders, chest arms, upper back and neck. Perfect for those who sit at a desk all day and need a niiiice opening stretch to counter any shoulder hunching!

HOW TO

  1. Begin in Table pose, on your hands and knees. You can choose to either have your toes tucked under your feet, or the tops of your feet relaxed on the mat (by sitting back on your heels in the posture a lovely stretch will be felt in the hips, thighs, and lower back).
  2. As you exhale, raise your right arm high to the ceiling, then "thread" it underneath your left arm until it settles on the floor, palm facing up, with right shoulder resting on the mat and your cheek on the floor.
  3. You can choose to have your left arm resting on the floor, or lift it and wrap it around your back and tuck your hand into your right hip crease to increase the twist.
  4. Hold and breathe in the posture. Letting any tension in your shoulders melt away. Stay here for 3-6 breaths (or longer if you want a deeper stretch).
  5. To come out of the pose, unwind your left hand (if you're in the twist), push up through your right hand and raise it to the ceiling, and come back up into Table pose.
  6. Repeat on the other side!