BLOG 1

YOGA FOR GOLFERS

yoga for golfersAs a golfer, you know it’s a sport all about the details. Every advantage – no matter how small – can make or break your game. When it comes to playing well, a golfer needs to harness the power of the body and of the mind. That’s why so many players swear by the benefits of yoga for golfers.

How yoga can benefit golfers

One of the most common issues golfers face is back pain. Unfortunately, chronic back pain is a common reason why golfers hang up their clubs for good. The repeated spinal rotation during your swing can actually decrease spinal mobility, leading to uncomfortable tightness and – worse case scenario – permanent injury.

Yoga for golfers is a safe, fun, and effective way to prevent back pain, increase flexibility through the spine, and improve joint mobility. In other words, yoga can free up your body and put the bounce back in your step.

Another issue many golfers face is an unevenness of muscle development. Most of us have a dominant hand that we use to perform daily tasks, things like writing, brushing our teeth, and using a computer mouse. Golfers use their dominant hand to play golf. As you play, you are only utilising muscles in one side of the body, causing an imbalance in muscle mass. Yoga is a full body exercise that stretches and strengthens from the head to the tips of your toes, bringing harmony back to the body.

But golf isn’t all about the body, right? You know full well just how much of a mental game it is. Well, yoga’s got you covered. Practicing yoga on a regular basis will improve your mental clarity and self-awareness.

Yoga for golfers: 5 Poses to Practice Regularly

So what does yoga for golfers involve? Let’s take a look at five poses that will increase stability through the core, and improve flexibility and mobility through the spine and hips. Just think how incredible you’ll feel!

1. Supported child’s pose

This calming posture helps eliminate stress and fatigue while reducing back and neck pain. It also provides a much-needed opportunity to breathe into your back to lengthen the spine and broaden the rib cage. You will need a bolster/pillow/folded blanket to practice this pose.

Start in a kneeling position. Bring your big toes together and knees wide, resting most of your weight over your heels. Pull your bolster/pillows/folded blankets between your thighs. Fold your upper body over your prop, resting your head to one side. Close your eyes, and wrap your arms softly around the top of your prop. Breathe deeply into your back. Hold for up to five minutes, switching your head to the other side half way through.

2. Sphinx

Sphinx is a fantastic multi-tasker: it encourages full mid-back and lower-back extension, strengthens through the shoulders, and opens through the chest.

Start lying on your belly. Potisiton your elbows directly beneath your shoulders, making sure your forearms are parallel. As you exhale, pull backwards with your forearms as if you are trying to pull your chest toward the front of your mat. (If you feel any sharp sensations in the lower back, widen your legs.) Activate through your mid-back muscles by pulling your shoulder blades down toward the floor. Hold for three – five deep breaths before resting onto your stomach and repeating twice more.

3. Kneeling Balance

Core strength is vital for spine stability. This kneeling balance works into your core while challenging your coordination.

Start in tabletop with your hands directly underneath your shoulder and your knees directly underneath your hips. Be sure to spread your fingers as wide as you can, and press into the thumb and index finger knuckle. Pull the navel into the spine to activate your core. Extend the right arm out in front of you. At the same time, extend the left leg behind you. There should be one straight line from the tip of your fingers to your toes.Take one full round of breath before releasing. Repeat on the other side, and aim for ten repetitions.

4. Revolved chair

Revolved chair is a challenging twist that promotes rotation through the thoracic spine. In addition, this posture activates the core, glutes, and groin, while encouraging lower-back stability.

Start standing with the feet hip distance apart. Bring your hands into prayer at the centre of your heart space. Bend through the knees keeping the back straight, as if you were sitting back into a chair. Once stable, twist the upper body to the right, hooking the elbow over the opposite knee. The top elbow extends upward as you aim to keep your hands in the centre of your chest. Hold for three breaths before repeating on the other side.

5. Half Lord of the Fishes with extended leg

This twist is great for re-balancing the left and right sides of the body, as well as opening through the chest and relieving tight hips.

Start seated. If your back or hips are particularly tight, sit on a folded blanket. Extend both legs in front of you. Bend through your right knee, and position your right foot on the outside of your left thigh. Place your right hand on the ground behind you. As you inhale, reach your left hand toward the ceiling. As you exhale, twist from your navel to the right. Hook your left elbow over your right knee to increase the twist. Breath deeply into your belly. Hold for up to one minute before repeating on the other side.

Start practicing yoga for golfers today

There’s no time like the present to improve your game! As a golfer, yoga can help relieve sore muscles, bring freedom into the spine and joints, and give you razor-sharp focus. Check out our Brisbane yoga timetable and Toowoomba yoga timetable to find a class near you. If you have any questions at all, or want to know more about our yoga classes, feel free to give us a call on +61 434 787 044.
UTTHAN PRISTHASANA FOR JUNE

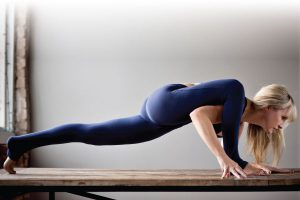
Utthan PristhasanaThis June we celebrate the Winter Solstice, the shortest day and longest night of the year. The Winter Solstice is an opportunity to set our goals and intentions for the coming months of warmer weather. Before we embark on the next stage of our year, we can use our yoga practice to let go of negative feelings and to create space for new ideas.
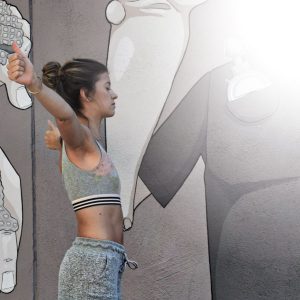
In yogic tradition, our hips are the storage grounds for our emotions. The practice of releasing tension in our hips allows us to let go of thoughts and feelings that are no longer serving us, while making room for new energy to flow. This month’s Zamasana can help us do just that.

Utthan Pristhasana, also known as Lizard Pose, is a deep hip opener that strengthens the inner hamstrings and groin. As well as stretching through the hips and hip flexors, Lizard Pose can help relieve tension through the chest, neck, and shoulders.

How to practice Utthan Pristhasana

1. Start in Downward Facing Dog. Raise the right leg high, before stepping the right foot between your hands.

2. Heel-toe your right foot toward the right edge of your mat. Your foot should be a little wider than shoulder-distance. Bring your right hand to the inside of your right leg.

3. Allow your hips to be heavy, so they sink down toward the mat. Keep the right knee hugging into the mid-line of your body.

4. Avoid collapsing through the chest and dropping the head. Instead, keep the head, neck and spine aligned by lifting the chin very slightly. Draw the shoulder blades together and down.

5. For a more active version of Utthan Pristhasana, keep the left knee lifted and left leg engaged. For a more restorative or yin version, drop the back knee onto the mat. You might like a blanket under the knee for added comfort.

6. As you begin to open through the hips, you may like to rest your forearms on the mat, a block, or a bolster.

7. Hold for up to 5 minutes before stepping back into Downward Dog and repeating on the other side.

Join us for more and enrol in Yoga Teacher Training.

YOGA FOR RUNNERS: 3 WAYS YOGA PREPARES THE BODY FOR RUNNING

yoga for runners

Did you know that running is the second most popular form of exercise in the world, with over 1.5 million Australians jogging on a regular basis?

Whether you’ve recently jumped on the jogging bandwagon, put your name down for a charity run, or have a marathon or two under your belt, you might be wondering how yoga for runners can improve your speed, recovery, and endurance. After all, yoga can do just about anything!

Let’s take a look at three ways yoga prepares your body for running.

1. Yoga for runners improves core strength

Running is a full-body exercise. When we run, we engage much more than just our legs. Strengthening our core is an absolute must if we want to improve our running ability, as it acts as solid foundation for smooth, economical, full-body movements while reducing the risk of injury. The key here is stability – runners need stable hips to stop unnecessary strain on the knees as the legs stride forward, and a stable upper body to allow for a powerful pumping of the arms. Both of these movements initiate from the core, meaning the stronger the core, the safer and more fluid the runner’s gait.

Practice for core strength

Practicing yoga is an effective way to improve your core strength, and as a result, improve your running capabilities. Warrior III – Virabhadrasana III – is a standing balance pose that works into your core. Another great option is to transition between plank and side plank on your hands or elbows as smoothly as possible. Take it really slow, holding for a breath or two in each position.

2. Yoga promotes breath awareness

Breath is a yogi’s superpower both on the mat and the running track, especially when it comes to long distance running. When we run, both our heart rate and breath speed up. Having a sense of the intensity of your breath, and then the ability to control it, will not only benefit your endurance, but also your runner’s mindset.

You may have heard runners mention being ‘in the zone,’ and maybe you’ve had that experience yourself. Being ‘in the zone’ is basically being mindful, running in an almost meditative state where each step is deliberate and conscious. Breath connectedness can help you to slip into ‘the zone’ with ease, making it much easier to run longer distances.

Practice for breath awareness

Every time we practice yoga, we practice connecting our body’s movements to our breath. Consider how you focus on your breath during a vinyasa style practice that flows from one pose to the next using the breath as the cue. Take this awareness with you on your next run. Listen to your body – if your breath speeds up too much, slow down, and breath deep.

3. Yoga relieves tight muscles

Running can leave your muscles feeling a little sore. A slow, deep yoga practice is an effective – and seriously relaxing – way to relieve tight muscles.

The repetition of the runner’s stride can cause muscles to shorten, creating tension in the body and restricting the range of motion. The main culprits here are tight legs and hips. Do keep in mind that regular runners will need some stiffness in their body to ensure safety and stability in their movement. Becoming too flexible can result in injury. Again, always listen to your body, know your limits, and avoid pushing or striving.

Practice for muscle relief

When it comes to relieving tight muscles with yoga, opt for a slower, deeper practice. Yin yoga is a wonderful way to unwind your body and quiet your mind. As we mentioned above, runners will most likely want to focus on stretching their legs and hips. Half pigeon pose is the mother of all hip openers, and will not only open through the hip joint, but also lengthen the hip flexor muscles. Check out our instructions on getting into this posture here. Remember to hold for at least one minute on each side for maximum benefits.

URDHVA MUKHA SVANASANA

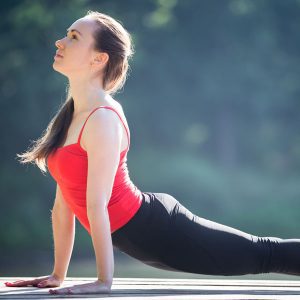
Urdhva Mukha SvanasanaAs the weather begins to cool, we develop a natural tendency to retreat inwards, to stay indoors, to become a little more reclusive. Ūrdhva mukha śvānāsana (upward facing dog), is an extroverted, energising posture that can help balance out our more introverted practices.

Upward facing dog is a powerful back bend that opens through the heart-space, while strengthening the spine, wrists, arms, and legs. It’s a fantastic remedy to ‘office slump’, the forward-folding position many of us end up in after hours of working at the computer or driving long distances. Sitting with a rounded spine for long periods of time can overstretch our back muscles and reduce strength in our abdominal muscles. Back bends such as upward facing dog are critical in keeping our spine healthy and our core strong.

How to practice Urdhva Mukha Svanasana

1. Lie on your stomach, with your legs outstretched and the tops of your feet on the mat. Bend through your elbows. Plant the palms of your hands on the floor beside your waist. Your forearms should be just about perpendicular to the ground.

2. Engage your belly, drawing the navel gently toward the spine. Press your palms firmly into the mat. Pull back through your hands, as if you were trying to pull the mat behind you. On your next inhale, straighten your arms. Lift your upper body, hips, and legs off the floor. Activate through the thighs, turning them slightly inward, and through the arms, drawing the elbows down away from the ears.

3. Draw the pelvis forward and toward the navel. Lift through the chest without forcing the ribs forward. Keep the gaze straight ahead or slightly upward. Avoid tipping the head back completely.

4. Hold for 1-5 breaths before releasing to the ground, or tucking the toes and pressing back into Adho Mukha Svanasana (downward facing dog).

EGO-ERADICATOR KRIYA FOR APRIL ZAMASANA

The weather is beginning to change and is gradually cooling, so you may find yourself feeling a little sluggish. As living creatures we naturally mirror the patterns in nature; Change alone requires energy, regardless of whether you enjoy the cooler months or not, and our bodies and minds need time to adjust.

Zing up the body and mind during this transition with a powerful kriya to blast through limitations and rid yourself of anything that is no longer serving you. This is a time where you can check in and throw away anything you do not wish to carry with you into autumn.

Gabrielle Bernstein describes this kriya as a better-than-coffee kriya to bring the best of yourself into your day. We can’t argue with that! This kriya is a way to summon confidence, break through any blocks that are in your way, and to invite energy to and from within you.

The practice – Ego Eradicator Kundalini Kriya

Begin by sitting on the heels, or in Easy Pose. This can also be completed standing
Lift the arms up to 60 degrees. Then soften the shoulders away from the ears
Curl the fingertips onto the pads of the palms, with the thumbs stretched back. Aim the thumbs at each other above the head
Begin breath of fire and keep going for 1-3 minutes
Afterward reach your hands straight up to the sky, take a deep inhalation, and hold it for as long as you comfortably can

3 minutes is all it takes to renew and refresh! Bring your truest and greatest self into the rest of the year.

SARVANGASANA MARCH ZAMASANA

As we soar into the new year, you may be beginning to feel a little overwhelmed with how quickly time is moving. Or maybe you’re feeling a little fatigued and sluggish from the record high temperatures we’ve recently encountered. Our Zamasana for March, Salamba Sarvangasana, will help you to relieve some of that stress, and help bring harmony back to the body and mind.

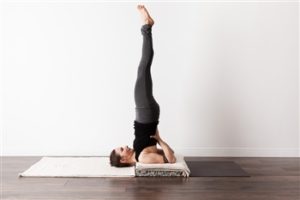
Salamba Sarvangasana means “supported all limbs pose”, which is commonly referred to as Shoulderstand. The benefits of this posture helps to promote good blood circulation, calms the nerves by stimulating the parasympathetic nervous system, reduces anxiety, insomnia, and irritability, eases fatigue, and aids digestive disorders.

HOW TO PRACTICE SARVANGASANA

We recommend using folded blankets under your shoulders as shown in the image to protect your neck.

1. Begin by lying on your back with your legs out in front of you and your arms by your side.
2. Slowly raise one leg at a time towards the ceiling, keeping your back flat on the ground and arms down by your side, so that your body is shaped like the letter ‘L’.
3. When you are ready, press your arms into the ground, and with control begin to lift your lower spine off the ground one vertebra at a time. Tilt your legs towards your head (keeping your knees bent if needed) until your weight is resting on the edge of your shoulders. Place both of your hands at your lower back to help support your weight and maintain the posture.
4. When you feel steady, you can begin to raise your legs upwards one at a time, maintaining a straight line from the edge of your shoulders to the tips of your toes. Take care not to force the neck into an extreme bend; leave space under the center of the neck to avoid over-straining. If practising without props, don’t worry about coming into a vertical line with the body. You will still benefit greatly from the inversion whilst keeping your neck safe too! (remember it is a shoulder stand not a neck stand).
5. To come down, slowly soften your knees towards your forehead, and with control lower your back one vertebra at a time. Once your back is fully connected back on the mat, you can lower your legs one at a time until you are lying flat on the mat.

COOL DOWN WITH SHITALI PRANAYAMA

With the intense summer heat that has been sweeping through Queensland we thought it was the perfect time to introduce you to Shitali Pranayama. Giving you a breath of fresh air our Zamasana for February is the go-to pose if your needing to cool off and there isn’t a pool in sight!

Shitali Pranayama meaning “the cooling breathe” is an amazing way to cool down the body and bring a sense of calmness. It is an amazing way to improve your focus; reduce feelings of anxiousness and anger and expel heat from the body.


HOW TO PRACTICE SHITALI PRANAYAMA:

  1. Find a comfortable seat on the floor or chair, relax both shoulder and keep the spine straight.
  2. Roll up the tongue lengthwise or move the tongue so that it forms a ‘O’ shape, and move it forward out of the mouth.
  3. Draw the breathe in through the tongue. Once you have filled your lungs with the breathe draw the tongue in and close the mouth.
  4. Release the breathe out through the nose.
  5. Repeat for 8 to 12 breaths.


ARDHA CHANDRA CHAPASANA FOR JANUARY

_ssa5705-2A New Year means a chance for you to be stronger, more stable and more centred. The January 2017 pose of the month, ‘Ardha Chandra Chapasana‘, is a beautiful heart opening pose that will help you build strength whilst challenging your balance.

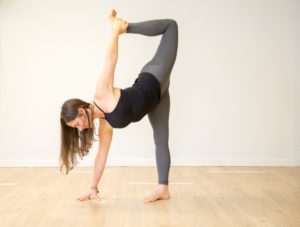
This challenging variation of Half Moon Pose offers both a balancing posture and an asymmetrical backbend. Ardha chandra means Half Moon in Sanskrit, chapasana refers to the bow or arc shape formed by the upper leg when you spine extends into the asana or pose.

In addition increased mindfulness and testing your balance this pose comes with many physical benefits. Ardha Chandra Chapasana builds strength and endurance into your core, legs and feet, which also increases your ability to balance and find your centre. As you stretch through your spine and lift that back leg upwards you will feel a sensational opening through the hips and feel greater length through the spine.

How to practice Ardha Chandra Chapasana

1. Find your way into half moon pose. Start by standing on your right leg, raise your left leg keeping it parallel to the floor and the left arm lifted straight up so that both arms form a straight line. Keep your foot flexed so that the sole is facing the back of the room.

2. Slowly bend your left knee and bring your left arm down to grab a hold your left foot behind. Make sure to grab the ankle and to keep the foot flexed!

4. Begin to draw your left foot toward your body with the left hand. At the same time kick into the hand with your foot to create a push-pull action which will form the bow shape in the spine, creating a back bend and allowing the blood-flow get into the spinal area!

5. Hold for one to five breaths (or more if you really want to test your balance) before releasing the left foot back into half moon position and then to the floor. Move to the other side and don’t forget to smile :-).

BUDDHIST METTA MEDITATION

Christmas is the perfect time of year to bring good habits back into our lives, especially habits of compassion and love. Our Zama-Asana for December, or rather our meditation for December, Buddhist Loving-Kindness Meditation, is the perfect way to do this. Loving-kindness meditation is a lovely practice traditionally taught by Buddha. It seeks to teach students habits of selfless or altruistic love, a love that does not expect anything in return.

This meditation is based on four principles; Metta (friendliness), Karuna (compassion), Mudita (appreciative joy) and Upekkha (equanimity). The combination of these four things allows us to not only feel unconditional love for ourselves but show an equal spread of loving feelings and acceptance in all situations and to all relationships in our lives. Perfect for the holiday season when we are surrounded by loved ones all day long.

How to practice this beautiful meditation:

1. Find a comfortable seated position. Bringing your attention to your “heart centre”, begin to breathe in and out from that area. as if you are breathing from the heart centre and as if all experience is happening from there.

2. As you breathe in and out, use this phrase, or one of your own, to offer metta to a loved one, to someone who you may be having difficulty with and to yourself. Say the phrase loudly and repeat it three times for each person whom you are offering metta to.

May they be happy.
May they be well.
May they be at peace.
May they be loved.

May I be happy.
May I be well.
May I be at peace.
May I be loved.

15152435_1170902632992564_1153972134_o


stabilise & strengthen with boat pose!

Paripurna Navasana (Full Boat Pose)

Our Zamasana for November 2016 is a popular pose that is used to build strength in the core region and lower back. Full boat pose or paripurna navasana is a great way to stimulate the kidneys, thyroid, prostate glands and digestive system. You will also find that your balance and concentration is put to the test when practising this pose!

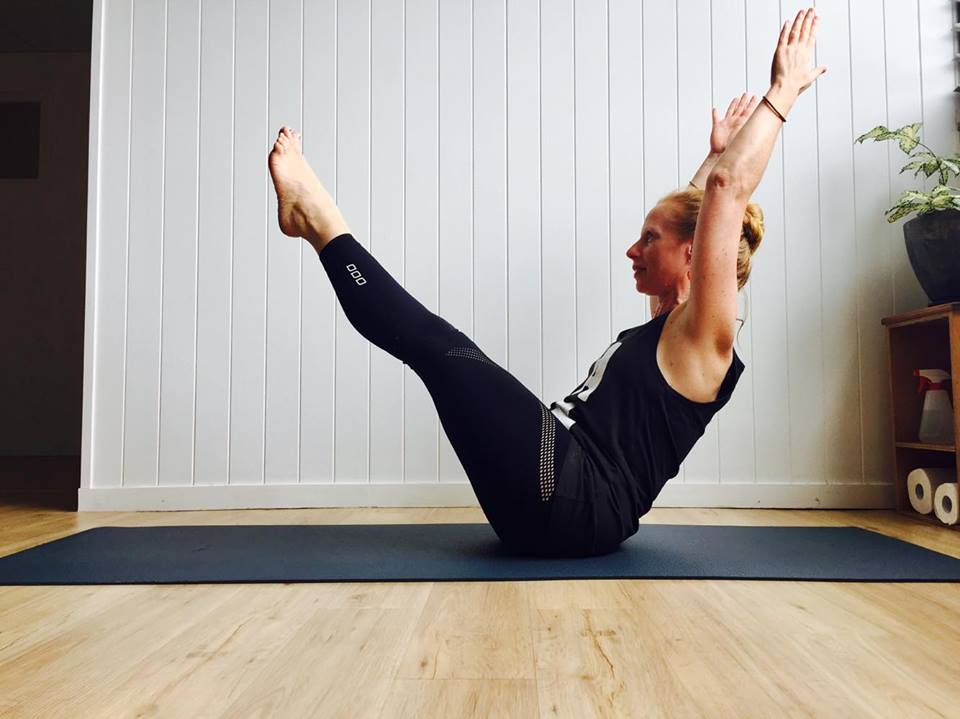
Navasana comes from the Sanskrit words “nava” (meaning “boat”) and “asana” (meaning “pose”). There are some variations that are commonly practised: Half Boat Pose (Ardha Navasana) One Legged Boat Pose (Eka Pada Navasana) and Full Boat Pose (Paripurna Navasana). We will work with these variations in class this month, while focusing on the full or complete version, where both the legs and arms become fully extended and our body forms a “V” shape resembling a small boat.

To practice boat pose…

  1. Start in a seated position with your with your knees bent and feet flat on floor. Place your hands slightly behind your hips behind you, fingers pointing towards the feet or front of your mat.  Remember to keep your back straight, find length in your torso and open up your heart space.
  2. Lean back onto the “tripod” (space between the sit bones and tailbone) and lift your feet off the floor, bringing your shins level with the floor.
  3. Extend the knees (where possible) to a 45-degree angle from the mat. Point your toes and keep length through your spine. If straightening the legs isn’t possible keep your knees bent, or lift the shins parallel to the floor.
  4. Stretch the arms out, parallel to one another and the floor. Reach out strongly through the tips of your fingers. If bringing the arms out isn’t possible, just keep the hands on the floor beside your hips or hold on to the backs of your thighs or knees. Tighten the belly and return to the breath.
  5. Stay in the pose for 10-20 seconds. Gradually increase the time of your stay to 1 minute. On the exhalation release the legs and return to sitting.

boat-sam