BLOG 1

pushpaputa hasta mudra for december

Summer is here, and with it brings the holiday season, a time of gratitude and appreciation. This December we’ll be focusing on Pushpaputa Hasta Mudra as our featured practice of the month.

In Sanskrit, pushp means ‘flower’, so the pushpaputa mudra is a gesture using the hands to indicate the giving of a handful of flowers, or flower petals, to the gods. It also represents the acceptance of gifts, and as such the pushpaputa mudra is a mudra of openness and acceptance. In that way, this mudra is a symbol of balance in our lives – and that we shall give, we shall receive. If we give out love, light and positivity, then the universe will send it back to us. And therefore, on the other hand, if we align ourselves with negativity, we will attract that into our lives.

Practice this beautiful mudra by joining the insides of the palms together, thumbs out, and curl the little fingers towards the centre. Thumbs rest on the first digit of the forefinger, and the fingers curl towards the palms until the hands resemble a heart-shape.

<3
bird of paradise for november

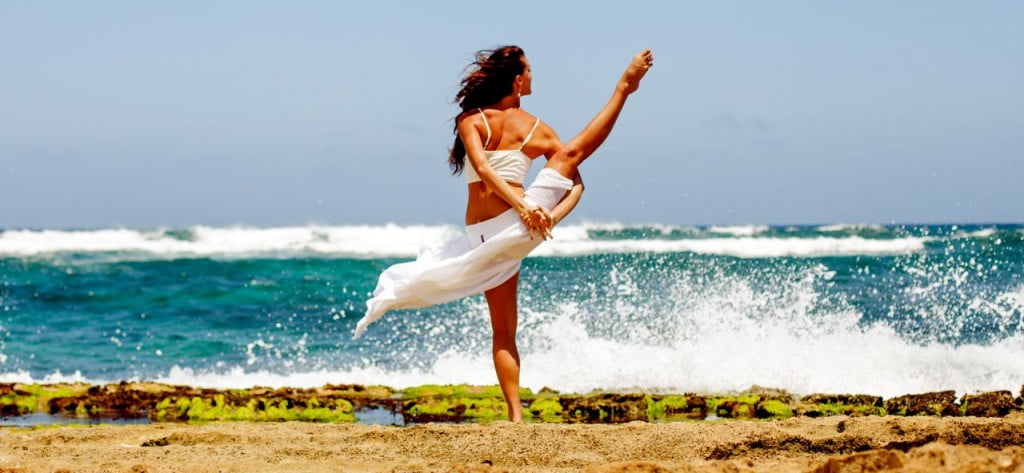
bird-of-paradise5-1024x473It wouldn’t be a challenge month without a challenging pose to play with! Meet Bird of Paradise pose (Svarga Dvijasana), a hip-opening, hamstring-stretching balance that will no doubt require all your concentration.
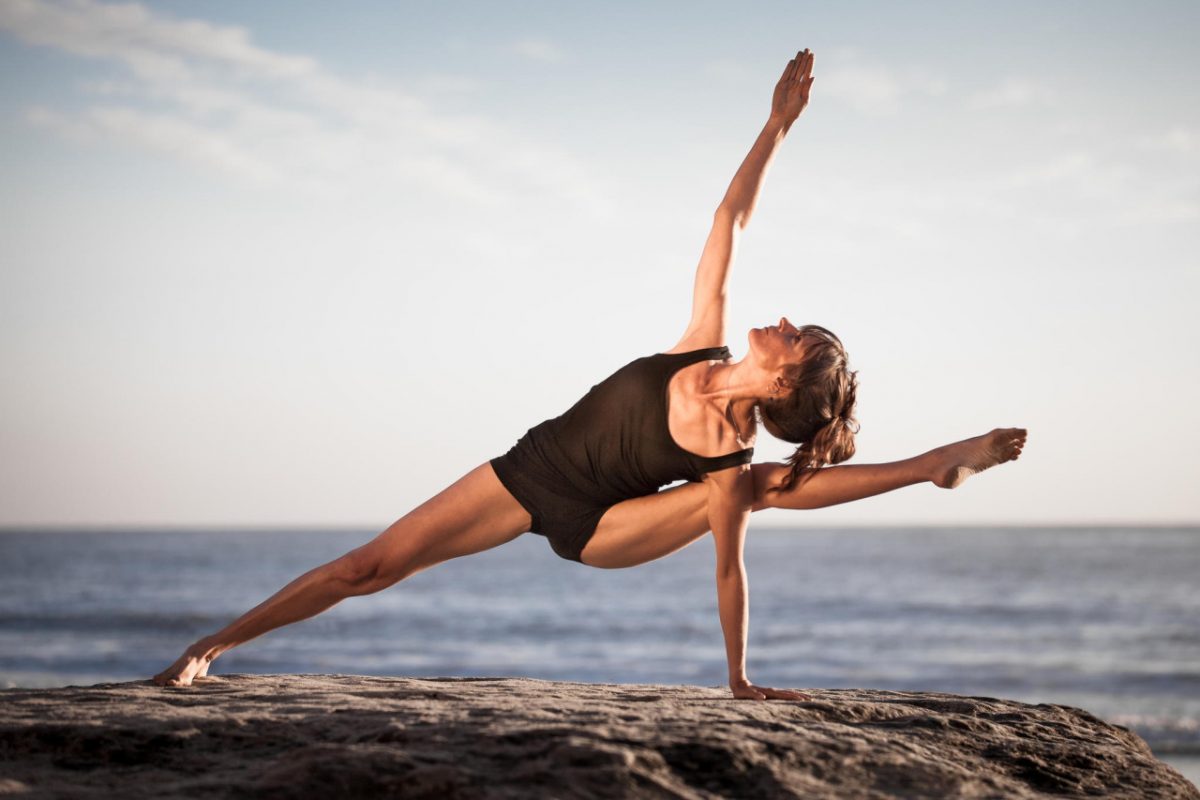
Just like the flower that shares its name, as this pose blossoms it opens with grace and strength. There are several poses that prepare the body for Bird of Paradise:

These poses will help you stretch and strengthen the parts of the body needed to come into Bird of Paradise correctly. There are some variations on the way you enter Svarga Dvijasana, but the following steps show the most common method:

  1. Begin in Warrior II pose, with left foot forward and left knee bent. On the exhale, draw your left arm under the inside of your left thigh and bring your right arm up and then behind your back. Draw hands together until they clasp and twist your upper body to the sky as you settle into Bound Extended Side Angle pose.
  2. Turn both feet to the front of the mat and start to creep them towards each other until they are hip distance apart and your torso is flattened to your thighs. Maintain the bind.
  3. Shift all your weight into your right leg and begin to carefully lift your torso, raising your bent left leg with it. Raise up until you are standing tall, crown of head to sky. You may like to stay with this variation, Bird of Paradise with a bent leg. Otherwise, continue:
  4. Expand the chest and draw the lifted left leg to the side as you slowly extend it, finding your balance in the pose. Revert to a bent leg to find steadiness. Hold your gaze steady and deepen your breath.
  5. Come out of the pose the way you came into it, in reverse.
  6. Repeat on the other side!


drishti for october

tumblr_nhixgvPRzy1qzmf0do1_1280It’s easy to let the gaze wander during a yoga class – you get distracted by the teacher, the candles at the front of the room, your neighbour’s loudly patterned pants, or their state-of-the-art water bottle. Alas, every time your eyes drift around the room, your attention follows and you slowly lose your focus, balance, strength and alignment within a pose.
A drishti, a focal point, is where to direct the gaze in a yoga posture or meditation. Drishti translates to vision or insight in Sanskrit, and is not just related to the practice of yoga asana (postures). Yogis in ancient times realised that where the gaze is focused, the mind naturally follows, and by keeping a strong, steady, fixed gaze, the mind can tune out surrounding stimulus and distractions. This helps our awareness draw inwards and helps our mind stay in the present – within a posture, on the yoga mat, and during meditation. During meditation, a drishti is used to concentrate the mind and stay focused. In yoga postures, a drishti is used to aid stability in a pose, and to deepen the primary movement of the asana as you hold for extended periods of time.

To practice and use a drishti in a yoga posture, think about where the alignment of the pose is naturally directing your gaze. Focus first on the alignment of the pose, then steady the breath, and then finally settle into your drishti. Of course, a drishti is particularly helpful when practicing a balance, but can also help you maintain a pose for an extended amount of time.


Let your drishti practice keep your attention on your mat this October! 


kakasana (crow pose) for august

crow pose

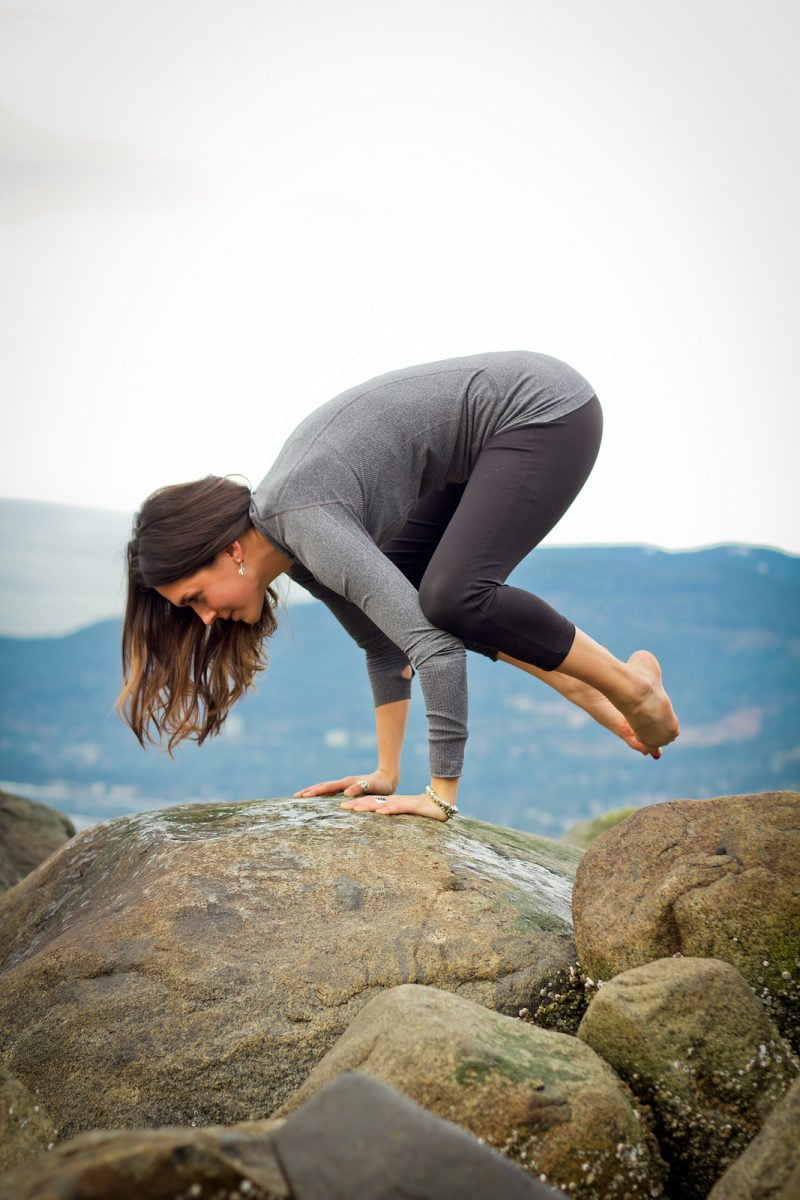
We’re busting out the crow pose for this month’s featured Zamasana! The crow, or kakasana (say kuh-kas-ana), is a beautiful arm balance that strengthens the upper back, arms and wrists and tones the abdominal organs. Kakasana is accessible for beginning yogis, and has several variations for those who are seeking a more challenging arm balance.


To practice the Crow:

  1. Begin in a squat with your feet a short distance apart. Plant your hands on the earth as you separate your knees wider than your hips.
  2. Tip your torso forward, between your thighs, and bend your elbows towards the body as you rest the backs of the upper arms against the shins.
  3. Lift up onto the balls of your feet as you press your knees into the backs of your upper arms, shifting your weight onto your arms as you do so. Work on holding your core strong and keeping your toes tucked toward your tailbone as you tip forward and let your feet lift off the floor. Enjoy the feeling of floating in space!


Let your Crow grow as you practice these variations:

  • Bakasana, Crane pose: From the crow, ensure your knees are tucked as high up your arms as they can be (near the armpits), squeeze the legs against the arms and slowly straighten the elbows. Keep your eyes looking at the floor or slightly forward.
  • Parsva Bakasana, Side Crane pose: Begin in a squat, hands planted on the earth. Take the right elbow to the outside of the left thigh and twist the torso, getting the thigh as close to the right armpit as you can before tipping forward and shifting the weight into the arms.

To practice even more arm balances and variations of Kakasana, join us in Toowong on Saturday 8th August at 10:45am for the 90 minutes Yoga Playground workshop, or sign up now for September’s Arm Balance and Inversion master class on Saturday 5th September at 4:10pm.


You should avoid practicing the crow pose and variations if you are pregnant.

chaturanga dandasana for july

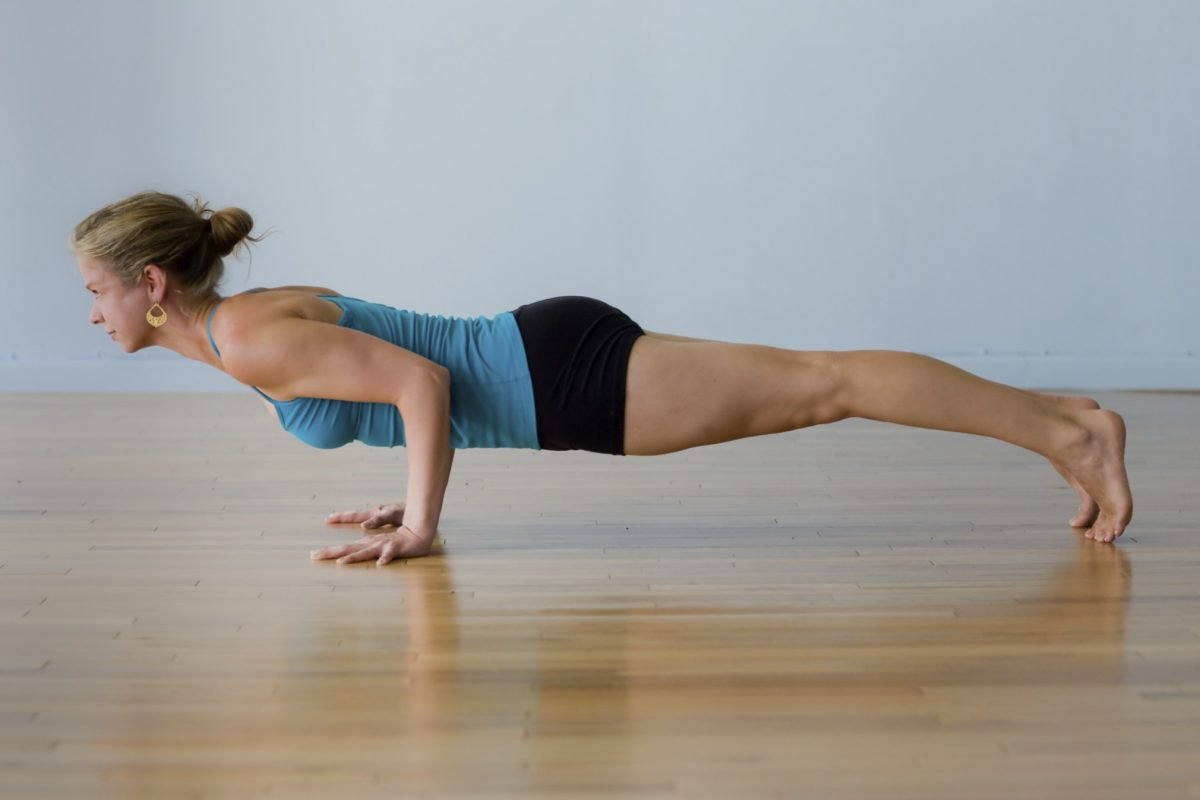
ChaturangaChrissyCarterChaturanga Dandasana (or just “chaturanga” as it is often known in classes) is our low plank position. Chaturanga means four limbs, danda means staff and asana means pose in Sanskrit – so this is the four-limbed staff pose. In a vinyasa class, as well as most hatha-based yoga classes, we will do this pose several times during sun salutations (Surya Namaskar). When done correctly, this pose helps you engage your foundational strength through the core of your body, preparing the body for further practices. Chaturanga Dandasana strengthens the arms, shoulders, and legs, and prepares the body for arm balances and inversions. As always, be mindful of the body and your own strength and come down to your knees if the body requires it.

However, for a pose that is practiced dozens of times a class, several yogis and yoginis unknowingly have incorrect alignment that is actually working the body harder than is needed.

For a correct Chaturanga Dandasana practice:

1. Begin in plank pose, with hands under shoulders and feet flexed firmly, leg muscles engaged.

2. Press into the soles of the feet and align shoulders ahead of wrists slightly as you engage the quadriceps and reach the sternum forward. Feel the straight, strong line of energy, the danda (staff), from the crown of your head to the feet.

3. Inhale as you draw the heads of the shoulders and tops of the thighs away from the floor, engaging the uddiyana bandha (drawing the abdomen up and in).

4. When the next exhalation comes, lower the body with control, bending the elbows and keeping them drawn in against your sides and keeping elbows over wrists. Maintain the straight plank position of the body as you lower, without sagging in the centre or tipping chest to ground and buttocks to the sky.

5. Keep your gaze forward or to the floor, just in front of your mat, and lower until your shoulders are at the same height as your elbows. You body should lower only as far as your elbows can attain a 90 degree angle, taking care not to sink the chest further.

6. To exit the pose, either exhale and release the belly down the mat, un-tucking the toes, or push back up to high plank pose, or alternatively draw the chest forward and come to the tops of the feet for upward-facing dog.

Some tips that may help your chaturanga dandasana:

  • If your body allows it, tuck the elbows as firmly as you can against your sides
  • Your drishti point (focal point) is important in any yoga pose, including the low plank. Your body will move in the direction of the eyes, so to keep your heart and chest moving forward, track your eyes forward or to a point just in front of your mat.
  • Reach through both the heels and the crown of the head to keep the strength through the body.
  • Use props! Loop a strap around the point above your elbows, pinning your elbows to your sides as you practice chaturanga dandasana to teach the body the feeling of only lowering to a 90 degree angle in the elbows. Use a block under each shoulder to ensure the chests stays high and level, or one block in the centre of the chest to keep that lift (play around with the height of the block to find the side that suits your body).

Enjoy the yogi push-up!

third eye for june

Ajna_YogaMat_Web_TemplateTo celebrate our wonderful Toowoomba studio’s 3rd birthday this month, our featured practice for the month of June is focused on the third eye (also known as the inner eye) chakra, Ajna. Ajna in Sanskrit directly translates to ‘I perceive’, and the third eye is said to provide vision, or perception, found beyond our regular physical sight. It is located on the forehead, between the eyebrows, and is related to our concentration and focus, as well as imagination and intuition.

As a special way to celebrate all things 3 this month, we will be focusing on three practices that balance and open the third eye chakra:

  • Eagle Pose (Garudasana)
    This pose requires physical balancing, and this act of concentration will balance Ajna. To practice Eagle Pose, begin by standing with feet shoulder-width apart, bending the knees and shifting the weight into the right foot as you lift your left leg and cross it over the right thigh. Your left foot can rest gently on the floor, or hook around your right calf, balancing on your right leg. To practice the matching Eagle arms, extend both arms then reach for opposite sides of the room, with your right arm over left. Bend your elbows and lift your hands skywards, feeling your right elbow rest in the crook of your left. If you can, connect your palms as you lift your elbows, stretching your fingers to the sky and looking through your hands to find your steady balance.
  • Child’s Pose (Balasana)
    For opening and stimulating the third eye chakra, we will be settling into everyone’s favourite resting pose, Balasana. To practice Child’s Pose, kneel and sit back on your feet, with your feet pointed inwards and knees separated. Rest your forehead (your third eye point) on the mat, if that’s comfortable for you, feeling that grounding connection, and stretch your arms out in front of you and relax them as you bring your focus to your breath.
  • Trataka (to look with a steady gaze)
    The word trataka in Sanskrit translates to “to look, or to gaze”, and it is the practice of fixing your gaze on an external point. Trataka as a meditation can be very powerful for your concentration. You can choose to stare at an object, image, symbol or candle flame. At first, your will feel your eyes begin to waver and water, then try to close, then they will relax. Once all your thoughts have drifted away, you can choose to close your eyes and hold the image fixed in your third eye.

We hope you enjoy your practice with us this month xx

nadi shodhana pranayama (alternate nostril breathing) for may

yin-yang-mandala-moira-gil-Our featured yoga practice for May isn’t a zamasana (asana meaning yoga posture) it’s a pranazama! (Pranayama is the control of prana, or life force, through the breath.) Nadi Shodhana Pranayama, or alternate nostril breathing, separates the flow of breath between the left and right sides, which helps to achieve balance within the systems of the body.
In yoga physiology, we talk about the nadi channels that flow through the body, connecting at special points of energy intensity, the chakras. The Ida nadi lies at the left of the body, and emulates the calming feminine energy of the moon (the yin) and links to the parasympathetic nervous system. The Pingala nadi channel is on the right side of the body, and represents the strong masculine energy of the sun (the yang) – linking to our sympathetic nervous system.

Nadi Sodha pranayama alternately stimulates the right-brain and then the left-brain. Increasing the flow of air in the right nostril stimulates the sympathetic nervous system and increases the heart rate, produces more sweaty palms, dilates the pupils and opens up the lungs – the fight or flight reaction. Increasing the flow of air through the left nostril however, stimulates the parasympathetic nervous system and increases digestion, lowers the heart rate and relaxes the body. By practising Nadi Shodhana pranayama, we are aiding the balancing of both of these systems in relation to each other, as well as balancing brain activity. This pranayama is said to purify the energy channels through the body (nadis), clearing the way for our prana to flow more easily.

To practice Nadi Sodha pranayama:

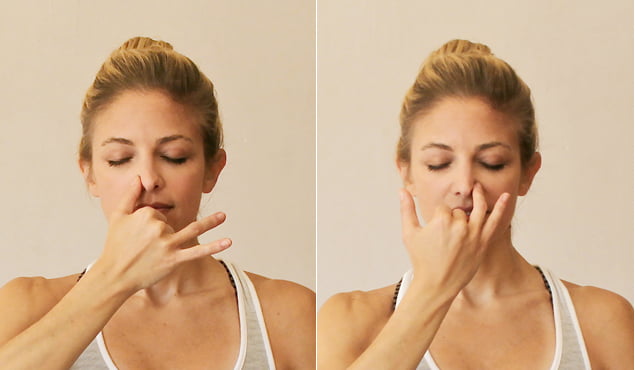
1. Sitting in a comfortable seated position, bring the right hand to mrigi mudra (index and middle fingers lowered, while thumb, ring and little finger extend). Alternatively, you can place index and middle finger on your third eye centre (the point just above the eyebrows in the centre of the forehead), and keep your ring finger and thumb free for this practice.

2. Using your thumb in either hand variation, gently close your right nostril and inhale through your left nostril. Close your left nostril with your ring finger, then open the right nostril and slowly exhale.

3. Keeping the right nostril open, inhale deeply, then close the right nostril and open and exhale through the left. This completes one cycles of this pranayama practice. Repeat as many times as you wish, then return to regular breathing.

At a beginner level, Nadi Shodhana is practiced just by focusing on the inhale and exhale, at equal lengths. Once this has been practiced comfortably, this pranayama practice can be advanced to include fixed breathing ratios and breath retention.

alternate-nostril-breathing

Nadi Sodha pranayama is used to relax the mind and prepare it for entering a state of mediation, so it can be a good idea to practice a short mediation after this pranayama. This month at Zama Yoga Toowong, we are running a Meditation Immersion, to learn about the basics of mediation and all the styles there are within this broad practice! Click here for more information and booking links.

reverse warrior | viparita virabhadrasana

The wonderfully powerful Reverse Warrior, or Viparita Virabhadrasana (say “vip-par-ee-tah veer-ah-bah-DRAHS-anna” – ‘viparita’ means reversed or inverted), also known as Peaceful Warrior, is a variant of Warrior II, and helps the body to strengthen, stretch and open: strengthening the arms, neck and quads, stretching the hips, groin and obliques and opening the hips, chest and shoulders.

To practice Reverse Warrior:

1. Begin in Warrior II.

2. Flip your front hand so the palm is facing upwards towards the sky as your back hand travels down to your back leg, palm facing towards the ground.

3. On your next inhale, let your front arm extend towards the sky, keeping your hips and legs in the same position as they were for Warrior II, and feel a side body stretch as you reach your heart up to the sky.

4. Keep the deep bend in your front knee with your weight distributed evenly on your front foot. Keep your gaze towards your top hand, and your neck relaxed and long as you hold Reverse Warrior.

5. Return to Warrior II, then repeat on the other side as you move through your sequence.

Variations on Reverse Warrior include straightening both legs, or to intensify the shoulder-opener, bring your top hand to the base of your head so that your elbow is pointing to the sky as your bottom hand wraps around your back to the hip crease of your front leg.

Please be careful in this posture if you have any neck or spinal injuries, recent shoulder injuries, or high or low blood pressure.

Enrol now in Yoga Teacher Training. 

circle of joy for march

For March, our featured Zamasana is actually a sequence, known as Circle of Joy. This sequence provides both a beautiful, gentle shoulder stretch, and a wonderful breathing exercise. While it can be done either standing or sitting, here at Zama we most often practice Circle of Joy in a cross-legged seated position, as demonstrated here by Francesca (one of our lovely Toowong teachers):

https://www.youtube.com/watch?v=7GIS6ZhYZ-0

In February we focused on the heart chakra, and Circle of Joy also works on opening the heart chakra. The heart chakra is known as the gateway to the higher conciousness, and links the lower chakras (physical) with the higher chakras (mind and spirit). Practiced as a gentle flow, Circle of Joy is ideal as both a warm up at the start of class, and as a way to finish a yoga practice. It also serves as a beautiful reminder of the importance of synchronising your breath with each yoga posture.

To practice Circle of Joy:

1. Begin in a comfortable cross-legged seat position, with hands together at heart centre.

2. Inhale as you interlace your fingers.

3. Exhale, pressing your palms straight out in front of you, feeling a stretch across your shoulder blades.

4. Inhale, lengthening your spine as you extend your hands up, palms (still interlaced) facing the sky.

5. Exhale as you release your hands down behind your back.

6. Inhale, and again interlacing your fingers behind your back, draw your chest forward as you stretch your clasped hands backwards and upwards.

7. Exhale, bring hands back to heart centre, palms together.

8. Repeat as many times as you desire!


Enjoy and be joyful! 🙂


melting heart for february

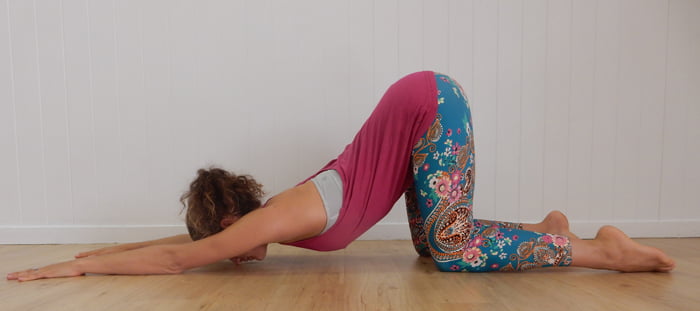
melting heartMelting Heart is our Zamasana of the Month for February. Melting Heart (Anahatasana) is also referred to as Extended Puppy Dog Pose (Uttana Shishosana). Melting Heart is a pose for the heart chakra, which is fitting for February – a month that is often thought of as a time to share love and heartfelt affection. As you practice yoga this month, you may choose to dedicate this posture to someone special in your life (or the wonderful being that is yourself!). This chest-opening pose is a beautiful release for the upper arms, shoulders and neck, and gently prepares your back muscles for future back bends.


To practice Melting Heart:

1. Start on all fours, with your hips stacked over your knees.

2. Slowly walk your hands out in front of you until your arms are straight, keeping your hips directly above your knees and hands shoulder-width apart.

3. Lower your heart to the ground, and gently allow your forehead to rest on the ground.

4. Draw your lower belly towards your spine and pull your hips away from your hands, feeling the stretch along your spine.

5. Breathe into your spine as you hold the pose for 30 seconds to a minute.

6. Release back into Child’s Pose, letting your buttocks rest on your heels.